Installing traffic spikes can be a hassle when you're not sure what you're doing, especially since it can differ depending on brand to brand or largely, if it's surface mount or flush mount. We've gone ahead and collected a few printable manuals, diagrams, as well as wrote out the steps you need to properly and safely install your Road Blade Surface Mount & In-Ground Traffic Spikes. Let's take a look!
General Installation Notes for Road Blade Traffic Spikes
Before getting started, there's some general guidelines that you should go over to ensure that your traffic spikes are not only safe but effective:
- Spike Orientation: Spikes should always be placed with the points facing away from oncoming vehicles.
- Signage and Visibility: It's important to keep spikes visible and have clear signage to indicate their presence. Traffic spikes are meant for traffic control, not traps.
- Speed Control Recommendations: It's recommended that extremely low speed is used on traffic spikes, around 5 MPH to ensure tires don't spin too fast and hit a spike unnecessarily.
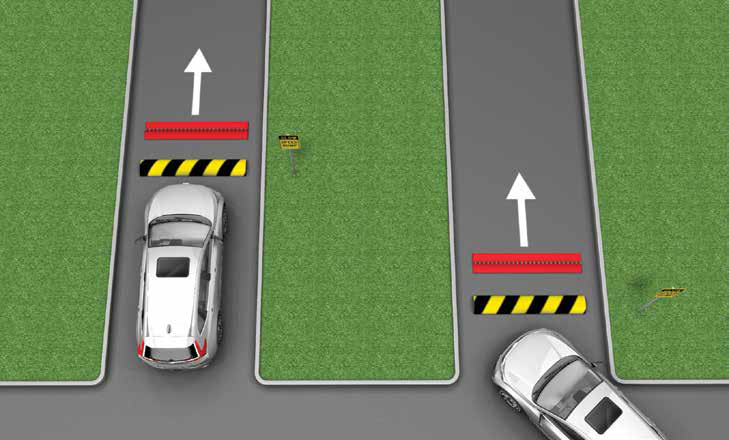
For best usage of your Delta Scientific Traffic Spikes, place your surface-mounted spike barriers:
- On flat surfaces, made of concrete or asphalt
- Where the max speed of travel is 5mph or less
- Away from public roads, so unintentional damage does not occur
- Away from pedestrian areas, or restrict pedestrians from the area
- 90° to the flow of traffic, so that unintended tire damage does not occur
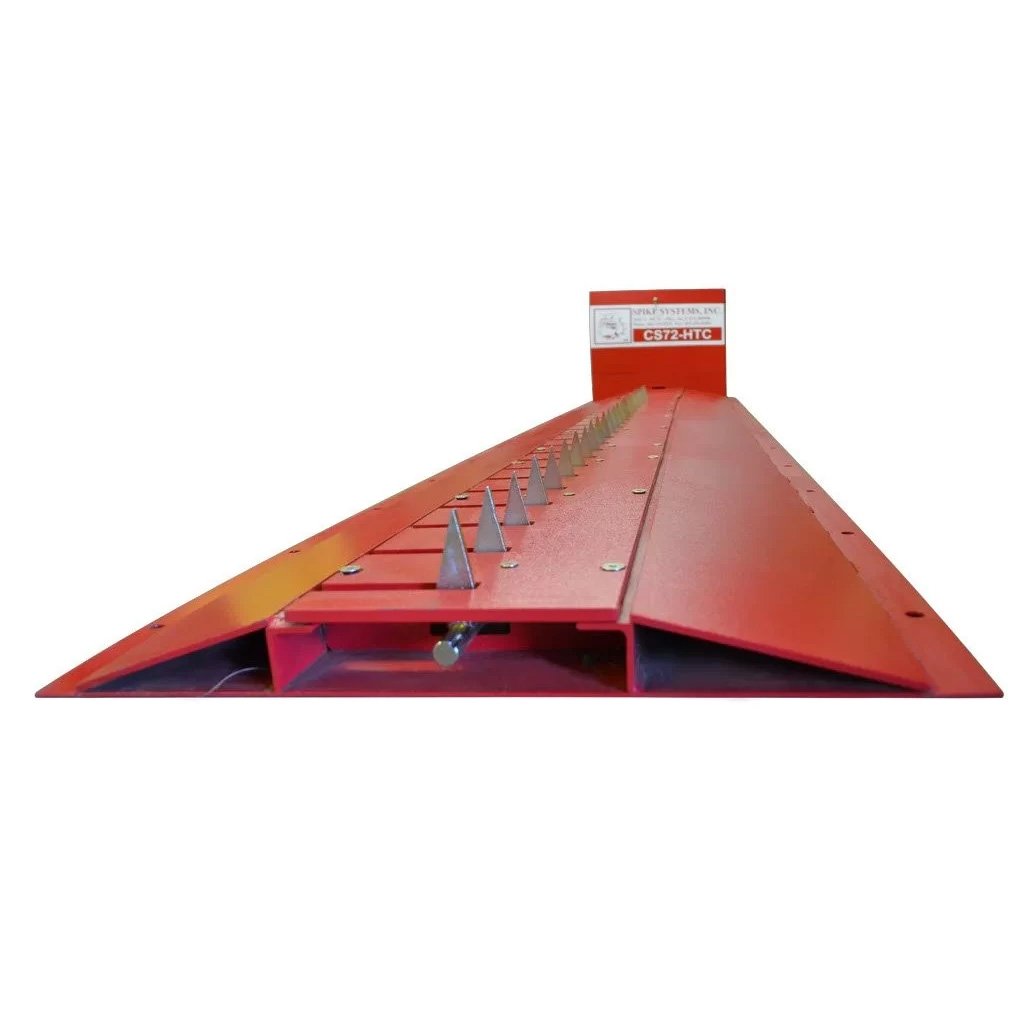
Road Blade In-Ground Traffic Spike Installation
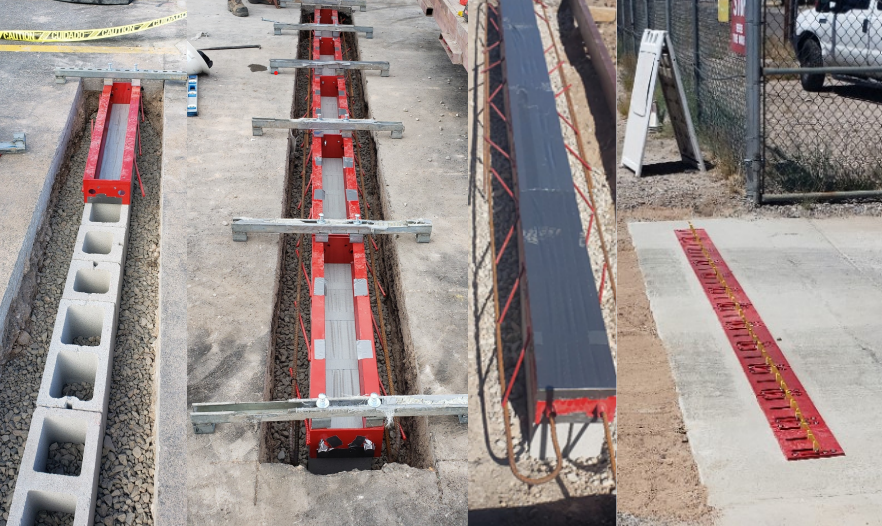
- Excavate the placement area 24 to 48 inches deep (depending on drainage needs in your area) by at least 12” longer and 8” wider than the units you are installing
- Fill the excavated area with size 1-1/2" to 2-1/2"crushed rock for drainage, compact and level to approximately 12” below the road surface
- Position the 8” CMU Hollow web cement blocks in the rock bed as shown in the drawing below as a base to support the traffic spike units and allow drainage
- Use at least three 8" CMU blocks per 36" section of spikes. Fill in between and in the hollow areas of CMU blocks with 3/8" to 3/4" crushed rock
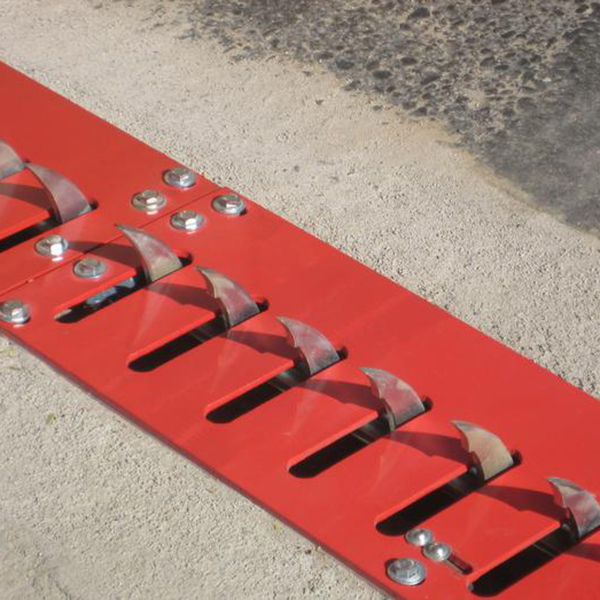
- Place the spike units on top of the CMU blocks making sure the top of the top plate of the units is flush with the pavement surface
- Make sure that the teeth are orientated the correct way for the intended direction of traffic flow
- When satisfied with the placement, orientation and positioning, place 3500 to 4000 psi concrete around the perimeter of the units until flush to the road surface
Printable Instructions
Note: Do not pour or allow concrete in the inside the spike housing. Use tape to cover all spike paths to protect. Do not pour concrete in to the gravel filled hollow areas of the CMU blocks. Doing so will restrict the water drainage.
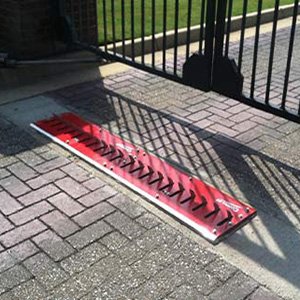
Road Blade Surface Mount Traffic Spike Installation
Concrete Surface Installation
- Mark the location with a chalk line or other suitable marks to assist in aligning and locating the units in the desired position. You may also place the individual segments in the location you wish to install them and then mark the location
- Make sure the teeth are orientated the correct way
- When bolting into concrete (not recommended for asphalt) drill holes in the road surface in the corresponding holes on each segment
- Place your anchors per manufacturer's instructions. Do not use an anchor that will stick up above the traffic control unit that could cause damage to the passing tires
- If your surface is asphalt the best method of application is using Construction Grade Epoxy supplied by Secure Lane or your local hardware vendor
- Turn each spike and end unit over and place close but not in the exact installation location on a cardboard or other protective material to catch any epoxy spills. The epoxy has a relatively short setting time and proper positioning of the segments can be facilitated by having them aligned and positioned close to the installation location
- Check to make sure that all units are aligned correctly
- Check the orientation again to insure they are correct to the traffic. Unlatch the latch down mechanism for this procedure
- Check again to make sure the area is dry and clean of any debris to insure the best bonding of the epoxy
- Follow the epoxy manufacturer's instructions for mixing and preparing the epoxy that will be used to affix the segments to the drive surface. It is advised that several items including rags, cardboard or the like be available for clean up of any epoxy overrun that may be encountered during installation. A stiff brush or small spatula works well for applying the epoxy mixture to the units
- Start with an outside-toothed segment (the epoxy should be applied to the toothed segments first and then end cap sections last if you are using them)
- Apply a coating of epoxy along the front edge and back edge and along each cross member coating all of the bottom plate that will contact the road surface
- After application of the epoxy turn the segment over and place in the previously marked position. Check the teeth position to make sure they are in the correct direction for the traffic flow
- Proceed with the next segment inline, following the same procedure and installing them with the interlocks securely in place
- After all the toothed segments are installed; the end sections can then be installed in a like manner
- Be sure to apply the epoxy as recommended to insure the proper distribution of the epoxy for the maximum adhesion of each segment. The amount of epoxy needed depends on the condition of the road surface. If the road surface has uneven areas or missing asphalt, more epoxy is needed to fill in and get a secure adhesion. If the asphalt is in good condition, a 1 gallon kit is needed for every 9 to 12 feet of spike. More is needed if road surface is in poor condition
- After all the segments and end section are in place you may then nail the units to the road surface using hardened nails. This is desired to insure the units stay fixed and do not move while the epoxy sets
Asphalt Surface Installation
When ready to activate make sure all warning signs and any other precautions you may have taken are in place. Then activate the teeth by loosening the latch down device and be sure to retighten the latch down mechanism after activating the teeth. Then your Road Blade traffic spike system is ready to protect your commercial or industrial facility.
Printable Instructions Shop All Road Blade Traffic Spikes